Controlling radio outlets
Original article (german) from sweetpi.de
pilight enables you to control various radio outlets with a Raspberry Pi. For this post, InterTechno radio outlets are used, but it should work for all devices listed on this wiki page.
Requirements
Software installation
You first need to install the pakcages required for compiling the source code.
pi@pilight:~# sudo apt-get install build-essential cmake git dialog
To download, compile and install the pilight source from it's git repository:
pi@pilight:~# git clone --depth 5 -b master https://github.com/pilight/pilight.git
pi@pilight:~# cd pilight
Set the setup.sh as an executable:
pi@pilight:~/pilight# chmod +x setup.sh
pi@pilight:~/pilight# sudo ./setup.sh
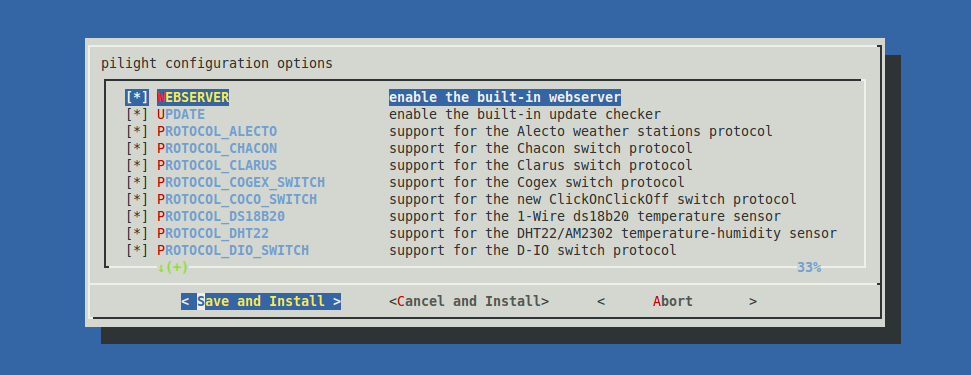
A dialog will then appear that allows you to select various features you want to include or exclude from pilight. For the ease of it, just let the options in their default state and press Save and Install.

pilight will then be compiled and installed. A settings file with automatically be created at /etc/pilight/settings.json with default pilight settings. In this file, you can change various settings specific to pilight.
pi@pilight:~/pilight# sudo nano /etc/pilight/settings.json
Connecting the hardware
The default GPIO pin used for the sender is pin 11 (wiringPi 0) and for the receiver pin 12 (wiringPi 1). The VCC must be connected to 5v and the GND to the 0v. Please make sure you are using the correct pins numbering scheme. The BCM numbering is different from the wiringPi numbering. To be sure about which type is which, use this scheme. Also notice the differences in board rivisions. If you are using an new Raspberry Pi, it most certainly is a revision 2 board. However, if you have an older one, first check which revision you have.
Using pilight
After we all hardware is connected and the setup ran without errors, we can now use pilight. To start pilight use this command:
pi@pilight:~/pilight# sudo service pilight start
Next start pilight-receive. This program connects to the pilight-daemon and outputs all codes received. When you start pilight-receive, it will wait for you to send codes. So, start pressing some buttons on your InterTechno remote. When all goes well, you should see:
{
    "code": {
        "id": 4762303,
        "unit": 0,
        "state": "on"
    },
    "origin": "receiver",
    "protocol": "archtech_switches"
}
Write down the id and unit numbers. With these numbers you can now control your radio outlets by using pilight-send. This program also required pilight-daemon to be active.
Turning your radio outlet on:
pi@pilight:~/pilight# pilight-send -p intertechno_switch -i 4762303 -u 0 -t
Turning your radio outlet off:
pi@pilight:~/pilight# pilight-send -p intertechno_switch -i 4762303 -u 0 -f
If you have any questions, feel free to ask them on our forum.


